We’ve all been there … Crashville. It’s not a place you want to visit frequently … but inevitably, we all make a visit. When I first started in CNC, one of my mentors told me “If you don’t bump it once in a while … you’re not experimenting … not trying new approaches … and not using it to it’s full potential.” Well … I’m not sure about that but there is a little truth in the concept.
Once you visit Crashville, you may notice some cutting errors and quirks developing in your workpieces. In this post we will be dealing with some of those unintended consequences of your visit to Crashville.
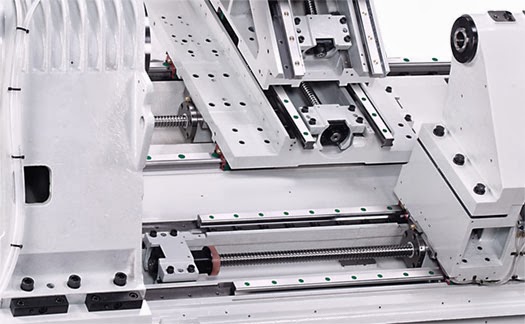
The first … tapers developing on your CNC lathe when turning or boring … the result of your headstock being bumped and not being square to the X axis ways. The result is that as the turret rides on the machine axis ways … and the headstock and ways are not “square” … you will be machining a taper. The amount of taper is the result of the amount of the mis-match between the headstock and the ways. It’s important to remember that the ways ( base ) of the machine and the headstock are not one-piece ( normally ) … the headstock is bolted onto the base. The illustrations below will give you a better idea.
So in our first post in our series … we would like to point you in the right direction and give some tips on re-aligning your headstock.
As the above pic and notes convey, the headstock is normally bolted onto the machine base … making the X / Z ways and the headstock independent of each other. Normally … there are alignment screws on the headstock assembly that allow you to move the headstock and thus align it “square” to the machine ways. When you visit Crashville … oftentimes one of those un-intended consequences is that that alignment is off because the headstock may have moved. So how do you get the correct alignment back?
There are a couple of methods … let’s start with my favorite … the one I consider the simplest and the one I used most in the field.

First … you’ll need a piece of stock. Qualifications? You need a good material, easy to machine yet with the ability to produce a good finish. I didn’t like using aluminum … I preferred some grade of steel like cold rolled or similar. We want to insure that everything we do is reflected in the material … not the workholding. So it’s best to use hard jaws on the chuck … and you want to make certain that the chucked material is not flexing … so the material diameter to overhang factor should be appropriate to insure that the material isn’t flexing when you’re cutting. You also want to have a good length sticking out of the chuck … after all the longer the area to measure the better your readings and the better your adjustments. Yes … there are a lot of factors to consider here … but you’re a machinist !!! You know what to do and what is appropriate.
It’s important to note here also what may be obvious … don’t use the tailstock. We don’t want any mis-alignment in the tailstock to reflect in our measurements.
Next … chuck up the material and clean up the stock by cutting the material the entire length. Take whatever cuts you need to clean up the stock … just make sure the last cut is a nice finish cut and leaves a nice finish. Usually using MDI or the job / feed manual options are the best method. Creating a program is a little overkill and using the handwheel may result in an uneven cut and finish.
Now measure the diameter at the furthest and closest points to the chuck along the turned diameter. Not the same? That’s the reflection of your headstock mis-alignment.
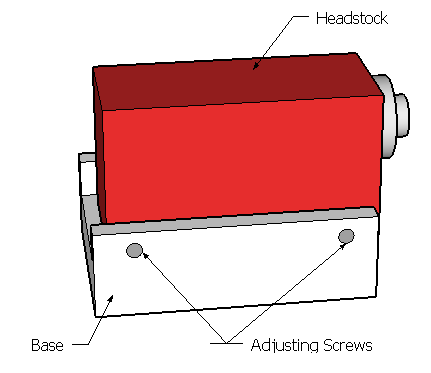
To adjust … you’ll need to find those adjusting screws on the headstock … the above illustration might shed some light on where they might be and how they work. You will need to slightly crack the bolts holding down the headstock body to it’s base … then use the adjusting screws to move it in the direction you feel you need to move it to re-align it. Tighten everything back up … and take another skim cut on the material. Repeat and re-adjust as necessary until the results are to your satisfaction. What should that be? As close as you can get it. If the material length in the chuck is short … it really needs to be spot on because obviously the error will get magnified on a longer piece of material. As with everything you do as a professional machinist … do it to the best of your ability.
One valuable hint : Place an indicator somewhere on the headstock to measure the amount you move the headstock with the adjusting screws. This will help you understand the relationship between the amount of movement with the amount of taper correction.
Another method which some people prefer … instead of using a piece of stock and turning the diameter … they will use a test bar. A test bar is a piece of stock that has already been machined and usually ground … it’s perfectly straight and true. They mount it in the chuck … indicate it in … and then use an indicator mounted to the turret which they then run back and forth along the test bar in Z as they adjust the screws on the headstock. This method works fine also … but you need a qualified test bar to start … and there are more variables that come into play. Is the bar indicated in and running true? Is your indicator on the turret reflecting the actual center of the test bar … etc.. For my liking … too many other variables … and a piece of stock is simpler, more readily available and cheaper.
So as you can see … this repair is not that hard … a little time consuming … but the result will leave you with a more accurate machine tool and a lot more money in your pocket … the amount you’ll save in a repair bill.
Hope this helps you recover from your inevitable visit to Crashville … and insures you are good chips … for years to come !!
Thanks in advance to everyone … and Happy Chip Making !!
For more Tips … Tricks … and other CNC & machine shop info …
Follow us on Twitter … @Kipware … by clicking the image below
![]()